Getting down to the wire on Mother's Day 2017... 11 days from today! Are you ready??
I'm going to show you how to create a super easy and uber Cute DIY gift for your mama!
Let's start with the board you have. Here's a little 411 on boards. Typical lumber 2x'whatevers' are not as they appear. For example...
- 2 x 6 is really 1.5" x 5.5"
- 2 x 8 is really 1.5" x 7.5"
- 2 x 10 is really 1.5" x 9.5"
And if you're working with 1x material, that's another secret language...
- 1 x 6 is really .75" 5.5"
- 1 x 8 is really .75" x 7.25"
- 1 x 10 is really .75" x 9.25"
Then of course, there are boards from places like sawmills, furniture makers and the like. Those babies are usually going to be true to size. Like a 1 x 6 is really 1" x 6".
But here is the thing. Any board can be upcycled and made more beautiful. For this project, let's start with your board.
As long as it is at least 5.5" tall and 42" long, we can make this work. (Side Note: if you happen to have a special piece of wood that you would like to use but it's more like 5" tall, just contact us. We'll size your order slightly smaller so you can use it. This applies to larger/taller boards as well)
It's pretty doubtful that you find the perfect height board and it's the right length too. So figure out which size of the product you're going with and cut the length on your board to accomodate it. Here's the suggestions from the product page:
- Cut 2 x 6 boards 42" long
- Cut 2 x 8 boards 56" long
- Cut 2 x 10 boards 70" long
Whether it's a 1x or a 2x, these sizes will fit.
Now then, you want your board to be kind of smooth. So grab that sanding paper. It doesn't have to be as smooth as the kitchen table. But you do want to have a nice level surface for the lettering to stick to. If you're working with anything except maybe rough-sawed lumber, this shoudln't take long.
If you want to stain it or paint it before you apply the lettering, now is that time for that too! I'd give either a few hours of dry time before applying the lettering, just to ensure a good 'stick'. But if you can wait a whole day, even better.
I covered this in great detail in The Complete Guide to Creating Craft Boards. Which is FREE when you sign up for our newsletter. (Click on the little envelope in the upper right-hand corner of this page to sign up and get your free copy!)
The product comes with instructions to install the lettering. Follow those and you should be A-OK!
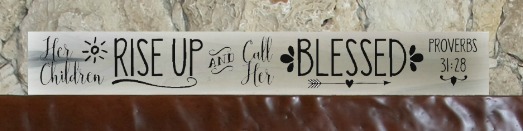
Homemade gifts are the best gifts. Really. They don't have to be perfect to be loved. Click on the picture below to get to the product page of what we've been talking about here.
So be patient with yourself. Follow the instructions. And enjoy the process :) As always, I'm one shout away if you need any help! jackie@tapestryoftruth.com
Create something beautiful today,
Jackie