"No way I could do that!" ... Part 2! Let's take another look at a vinyl installation that I hear from many people on; how there is no way they could do that!
Really? No way at all?? I'm not buying it.
Let's look at a vinyl installation that can come across kind of scary, but is really not much different than installing the single row of text.
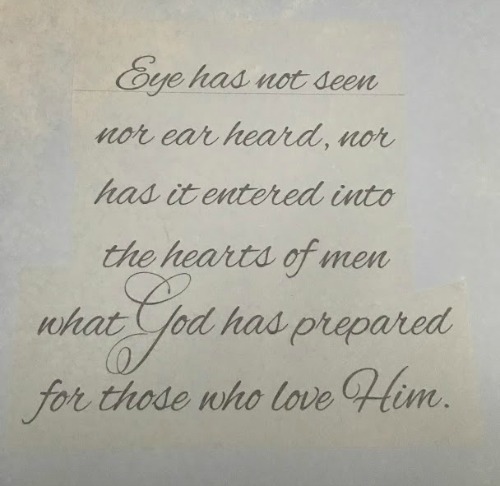
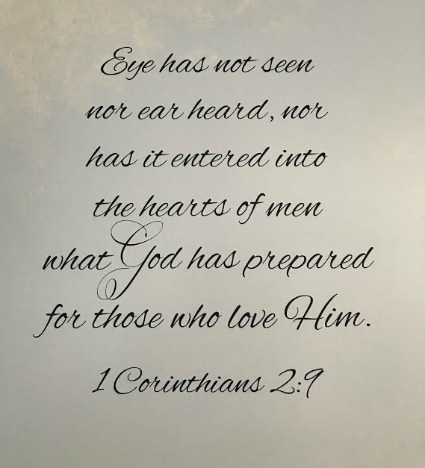
Today, let's talk about installing multiple rows of text, like this:

A few weeks ago we discussed how to install a single row of vinyl lettering text in the blog post No way I could do that!! Part 1
A lot of that instruction is going to transfer to this one. So before you read on, take a trip over there and read that post first.
Done? Great :)
If you're installing the lettering exactly as it was shipped to you, and it was shipped on one sheet with multiple rows of text, let's start at the beginning.
Take it out the box/tube and let it relax.
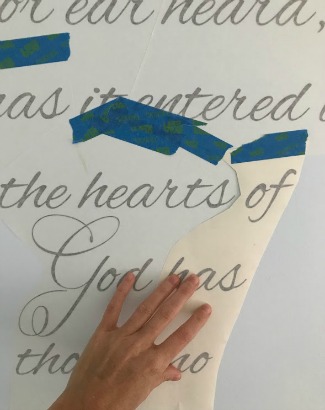
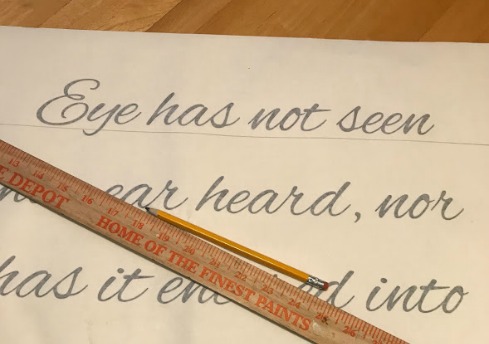
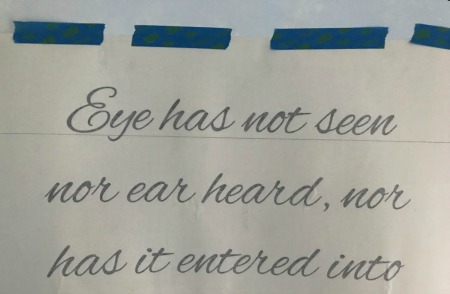
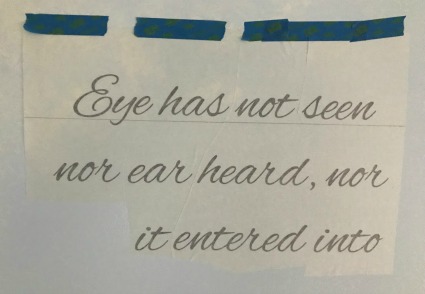
Now with a straight edge or yard stick, on the masking side of the lettering (the side that is slightly see through), draw a straight line under the entire first row of text. This is what you are going to use to level the words on your wall.
Next, you want to hang it on your wall with spot tape on the right and left. (Side Note: if it's particularly long from right to left, enlist the help of a buddy just for this part. You can still do the rest by yourself if you have to.)
Then using the line you just drew in yourself, measure off of the ceiling or floor and get it level.
After it is level and where you want it to ultimately be "stuck" put a solid tape hinge at the top to hold it firm in that position on the wall.
OK... this part is kind of cool.
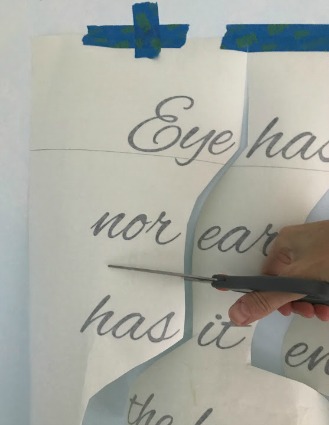
Remember in Part 1 where we cut between the words to create a sort of fringe; giving us more manageable sections to install one at a time? Well, we are going to do the exact same thing here. The only difference is that we are starting from the bottom of the product, under the last row of text.
***REMEMBER*** Do NOT cut the vinyl itself. Vinyl lettering shrinks ever so slightly over time. And if you create a cut line between an even flow of lettering, that will show up as a tiny split in the vinyl after it shrinks. Cut between the letters without cutting them.
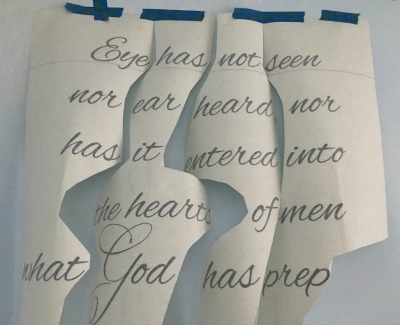
You may have some oddly shaped pieces of fringe due to the cutting between (and not through) the words. But don't let that bother you. Just let it hang naturally on the wall from the tape hinge. It will all come together.
I have installed a lot (and I mean a LOT) of products like this, having multiple rows of text. So take it from me - it might look a little crazy while you're doing it. But it will all come together nicely in the end.
I promise.
Now that you have cut from bottom to top and created a bunch of manageable sections to work with, let's pick an end and install our first piece. If that piece is super weird and has a wider end or super narrow middle, cut it somewhere in the middle. Don't make the piece you're working with too small, but cut enough off that you can handle it by yourself.
Following the steps in Part 1, you just want to carefully peel the glossy paper backing away from the masking making sure that the lettering is staying stuck to the masking and not coming off with the glossy paper backing. After the paper is removed, start from the tape hinge on the top side of the masking and smooth it against the wall in a downward motion. Keep going until the whole piece is against the wall.
Then leave it alone and move to the next section on the right or the left. If you cut the bottom portion off of the piece you just installed, leave it be for now. We'll come back to that in a minute.
You want to get all the pieces from right to left installed first. Then, we come back and add the pieces that we cut off.
Now, begin with the next (or final) row(s) of text. Install it the very same way you did the other pieces. The only difference is, you're placing back into the image where you cut it out of. It's very much like putting a puzzle together.
And don't make it complicated. It's OK if you have a slight gap between the pieces of masking. You will never notice it when you're done. You won't.